Surface Profile Measurement by Replica Tape
The surface profile measurement by replica tape (Press-O-Film or testex tape) is performed after sandblasting, i.e., SSPC-SP 10 (near-white metal blast cleaning), SSPC-SP 5 (white metal blast cleaning), etc. to make sure the sandblasted surface has the required profile as indicated in the customer coating specification.

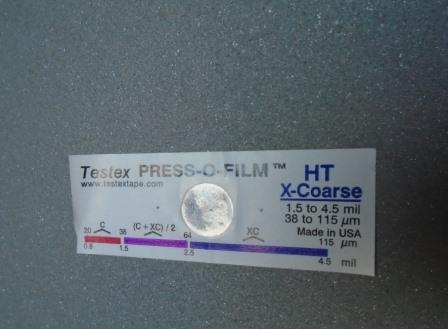
The test is performed just after sandblasting; the selected spot is cleaned by blowing air to remove loose dust that is the product of sandblasting. Two type of replica tapes is available in the market i.e. coarse and extra coarse.The surface profile measurement almost is a mandatory requirement by most coating specifications.
The "Coarse Tape" was made for the surface profile of 0.8 thru 2 mil (20 to 50 μm) and "Extra Coarse Tape" made for 1.5 to 4.5 mil (37 to 112 μm). You should pick the replica tape which is much closer to your customer specification. So if the customer specification requires 2 thru 3 mil surface profile, then you have to use Extra Coarse tape.

Surface Profile Measurement Procedure
Remove the cover from the tape and adhere to the surface and rub the little circle (thin foam film) with rounded objects. A swizzle stick comes with replica test package that you can use as a rounded object.
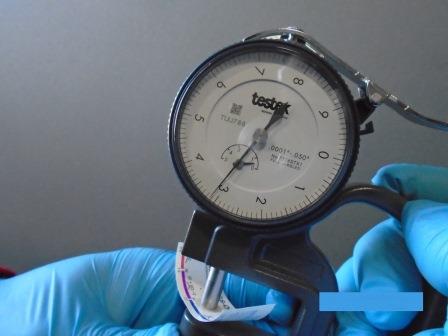
Then remove the replica tape and measure the thickness of the circle area (thin foam film) with a calibrated anvil micrometer. Record the micrometer value and deduct from 2 mil (this is foam film thickness). The obtained value from this subtraction is your surface profile.
Return to Coating Inspection
Related Articles; Power Tool Cleaning, Commercial Blast Cleaning, Brush-off Blast Cleaning, Dry Film Thickness, Air Compressor Blotter Test, Surface Dust Test, Paint ITP