Watch our Most Recent Videos | Visit us on LinkedIn | Visit us on YouTube
Dye Penetrant Inspection Procedure Article by I4I Academy LLC
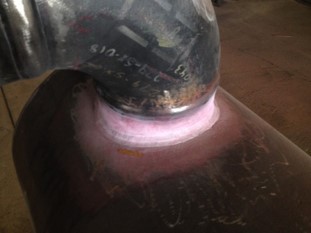
This I4I Academy LLC article provides you with a example dye penetrant inspection procedure. This procedure contains water washable process with both visible and fluorescent systems.
1.0 DYE PENETRANT INSPECTION - SCOPE
1.1 This procedure establishes the general requirements of Penetrant Testing of ferrous and non-ferrous components (essentially non-porous) and welds by Water Washable Process, Visible and Fluorescent Penetrant Systems and are to be followed by NDT personnel Third Party.
Dye penetrant inspection procedure requirements are covered in several I4I Academy courses, including API 510 pressure vessel inspector training course for in-service pressure application, API 570 piping inspector for in-service piping application, and API 653 Aboveground storage tank training course for in-service storage tank application.
2.0 DYE PENETRANT INSPECTION - PURPOSE
2.1 The requirements are intended to detect discontinuities that are open to test-surface and free from contaminants by interpreting the surface indications and evaluating them in accordance with the applicable referenced codes, standards or specifications by certified NDT personnel qualified in PT to Level II.
2.2 Customer’s approved specific Inspection/Evaluation manuals have also to be followed strictly, if available and applicable.
2.3 Any
conflicts between any points of this procedure and the referenced documents or
job specifications of customer shall be resolved (if given in writing) by the
appointed ASNT NDT Level III or the Divisional Manager (NDT) or his authorised
representative.
2.4 Where special circumstances require unique techniques of Penetrant Testing by Water Washable Process, specific technique sheets shall be attached as Annex: IV etc., with the written approval of NDT Level III.
3.0 DYE PENETRANT INSPECTION - REFERENCES
| 3.1 | ANSI/ASME B31.1 | Power Piping |
|---|---|---|
| 3.2 | ANSI/ASME B31.3 | Chemical Plant and Petroleum Refinery Piping |
| 3.3 | ASME Sec.V | Boiler and Pressure Vessel Code |
| 3.4 | ASME Sec.VIII | Boiler and Pressure Vessel Code |
| 3.5 | ANSI/AWS DI.I | Structural Welding Code - Steel |
| 3.6 | API 1104 | Standard for Welding Pipelines and related facilities |
| 3.7 | API 620 | Dsign and Construction of Large, Welded Low Pressure Storage Tanks |
| 3.8 | API 650 | Welded Steel Tanks for Oil Storage |
| 3.9 | ASTM E-165 | Standard Test method for liquid penetrant test |
| 3.10 | ASTM E-1209 | Standard Test Method for Fluorescent Penetrat Examination using Water Washable Process. |
| 3.11 | ASTM E-1418 | Test Method for Visible PT using Water Washable |
| 3.12 | ANSI/ASNT-CP-189 | Personnel Qualification and Certification Standard |
| 3.13 | SNT-TC-1A of ASNT | Personnel Qualification and Certification Guidelines |
4.0 SUMMARY OF TEST METHOD & WATER WASHABLE PENETRANTS
4.1 A liquid penetrant which may be a visible or a fluorescent material is applied evenly over the surface being examined and allowed to enter open discontinuities. After a suitable dwell time, the excess surface penetrant is removed. A developer is applied to draw the entrapped penetrant out of the discontinuity and stain the developer. The test surface is then examined to determine the presence or absence of indications.
Note: Caution - Fluorescent penetrant examination shall not follow a visible penetrant examination because visible dyes may cause deterioration or quenching of fluorescent dyes.
4.2 Processing parameters, such as surface precleaning, penetration time and excess penetrant removal methods, are determined by the specific materials used, the nature of the part under examination, (that is, size, shape, surface condition, alloy) and type of discontinuities expected.
4.3 Liquid penetrant examination methods indicate the presence, location and, to a limited extent, the nature and magnitude of the detected discontinuities. Each of the various methods has been designed for specific uses such as critical service items, volume of parts, portability or localised areas of examination. The method selected will depend accordingly on the service requirements.
4.4 Water-Washable Penetrants are designed to be directly water-washable from the surface of the test part, after a suitable penetrant dwell time. Because the emulsifier is “built-in” to the water-washable penetrant, it is extremely important to exercise proper process control in removal of excess surface penetrant to ensure against overwashing. Water-washable penetrants can be washed out of discontinuities if the rinsing step is too long or too vigorous. Some penetrants are less resistant to overwashing than others.
4.5 Post-Emulsifiable penetrants with lipophilic and hydrophilic emulsifiers are not included in this procedure.
5.0 EQUIPMENT AND MATERIALS
5.0 EQUIPMENT AND MATERIALS:
5.1 This procedure is intended for use with the following consumables or their equivalent. It has to be ensured that the consumables are selected in such a way that they are compatible to the test surface and object and as per test requirements.
Dye Penetrant Inspection - Water Washable, Fluorescent Penetrant System
| Manufacturer | PENETRANT | REMOVER | DEVELOPER |
|---|---|---|---|
| Sherwin | HM-440, HM-430 | Water | D-100, D-100NF |
| Ardrox | P133D, P134D, P135D | Water | 9D1B |
| Magnaflux | ZL-60C | Water | SKD-LT or ZP-9F |
Dye Penetrant Inspection - Water Washable, Visible Penetrant System
| Manufacturer | PENETRANT | REMOVER | DEVELOPER |
|---|---|---|---|
| Sherwin | DP-51 | Water | D-100, D-100NF |
| Ardrox | 906/303A | Water | 9D1B |
| Magnaflux | SKL-WP | Water | SKD-NF,SKD-S, ZP-9B |
5.2 Intermixing of penetrant materials from different families (manufacturers) is not permitted by this procedure.
Manufacturer’s recommendation for compatible penetrant systems must be adhered with.
5.3 Dye Penetrant Inspection - Control of Contaminants
When testing nickel based alloys, austenitic stainless steels and titanium, contaminant content of penetrant materials shall be controlled. Control shall be based on the manufacturers batch certification which shall include, as a minimum, the manufacturer’s name, batch number and chemical contaminant content as determined in accordance with ASME Section V, paragraph T-625.
Only dye penetrant inspection materials having a batch number printed on the container and traceable to a valid manufacturer’s batch certification on file shall be used.
6.0 PARTS TO BE EXAMINED
This procedure shall be used for parts or welds in ferrous and non-ferrous materials in accordance with applicable code or specifications for parts or welds.
When welds are tested, at least one inch of the base material on both sides of the weld is to be covered.
7.0 SURFACE PREPARATION
7.1 Prior to the test, the area to be inspected and at least one inch on either side shall be free from all contaminants (dirt, grease, lint, slag, spatter, oil, scale, water and protective coatings).
7.2 In general for welds, satisfactory results may be obtained when the surface to be inspected is in as welded condition.
If mechanical methods of cleaning like grinding, machining or sanding is necessary, the surface area shall be etched to remove smeared metal. (For full details, ASME Sec. V, article 24 and SE-165 shall be referred).
After etching, suitable neutralising solutions shall be used and test surface be washed with water.
7.3 Unless otherwise recommended by the manufacturer, welded components or parts cleaned by Vapour degreasing, organic solvents or detergents, and properly protected from contamination, need not be re-cleaned with penetrant cleaner (remover) prior to application of the penetrant.
On occasion, a wire brush may be helpful in removing rust, surface scale, but it is used only when no other means of removal will surface. It shall be followed by cleaning with penetrant cleaner if compatible.
7.4 Dye Penetrant Inspection - Drying:
Evaporation time, following precleaning, shall be 5 minutes minimum. Where indications of retained moisture exist, the evaporation time shall be increased till no evidence of moisture in the area of test can be detected.
8.0 EXAMINATION
8.1 Dye Penetrant Inspection - Temperature Limitations:
The temperature of the penetrant materials and the surface of the part should be between 50°F and 100°F for fluorescent water washable penetrants and between 60°F and 125°F for visible penetrants.
8.2 Dye Penetrant Inspection - Penetrant Application:
a) Either immersion (dipping), flow-on, spray, or brushing technique is used to apply the penetrant to the precleaned dry specimen.
b) The penetrant is applied evenly over the entire area.
c) Fillers shall be used on the upstream side of the air inlet when using compressed air to apply penetrant.
8.3 Dye Penetrant Inspection - Dwell
times:
a) Penetrant dwell times are critical and should be adjusted depending on temperature and other conditions and may require qualification by demonstration for specific applications.
b) Typical minimum penetration times are given in the Table-1.
c) Penetrant shall remain on the test surface for the entire dwell time period.
d) Care shall be taken to prevent drying out of the applied penetrant and additional penetrant must be applied to re-wet the surface.
Dye Penetrant Inspection - Typical Minimum Penetration Times
8.4 Dye Penetrant Inspection - Excess Penetrant Removal:
After the elapse of penetrant dwell time, the excess penetrant is removed by water spray. Water at 60°F to 110°F and a pressure not exceeding 30 psi (210 KPa) is applied with droplet type sprayer specifically designed for penetrant removal. The nozzle of sprayer is held so that water strikes the surface of the specimen at an angle of approximately 45 degrees. Care is to be taken to avoid over-washing, which causes washout of penetrant from discontinuities. Other methods of referenced codes or specifications could also be used if applicable for the test surface conditions.
8.5 Dye Penetrant Inspection - Drying:
The test surface must be dry prior to the application of non-aqueous or dry developers. If water-based wet developer is used, it is applied to still damp specimen immediately after the penetrant removal wash. Excessive heat or too long a drying time tends to bake the penetrant out of discontinuities.
8.6 Dye Penetrant Inspection - Developer Application:
When the drying process is complete, the specimen is ready for the application of either dry or non-aqueous wet developer. When water-based wet developer is used, it is applied by flooding the surface to the wet specimen immediately after excess penetrant is removed.
It is recommended to use aerosol cans, after agitation, typically for weld inspection at various project-site works. Spray distance shall be 10” to 12” from test surface. The test-areas must be cool enough to prevent too repaid evaporation of the developer vehicle.
Dry developer is applied to the specimen by brushing with soft brush, by use of a powder gun, or by dipping the specimen in a tank of the developer and removing excess powder with a low pressure air flow.
An even thin coat/film of developer is preferred.
Applied developer shall not be removed from test surface.
8.7 Dye Penetrant Inspection:
8.7.1 The area under inspection shall be observed during application of developer and at intervals during development time.
8.7.2 The recommended development time is between 7 and 30 minutes.
Development time begins directly after application of dry developer and as soon as wet developer coating has dried on parts-surface.
8.7.3 Indications getting formed and formed at the test surface (by the blotting action of developer) be noticed, analysed (relevant indications be noted) under adequate lighting conditions.
8.7.4 Lighting Conditions:
a) Visible penetrant indications can be examined in either natural or artificial light. Adequate illumination is required to ensure no loss in the sensitivity of the examination. A minimum light intensity at the examination site of 100 fc (1000 Lx) is recommended.
b) Examine fluorescent penetrant indications under black light in a darkened area. Visible ambient light should not exceed 2 ft candles (20 Lx). The measurement should be made with a suitable photographic-type visible light meter on the surface being examined.
Black Light Level Control - Black light intensity, minimum of 1000 µW/cm2, should be measured on the surface being examined, with a suitable black light meter. The black light wavelength shall be in the range of 320 to 380 nm.
The intensity shall be checked at least once every 8 hours, or whenever the work station is changed. Cracked or broken ultraviolet (UV) filters should be replaced immediately. Defective bulbs, which radiate UV energy, must be replaced before further use. Since a drop in line voltage can cause decreased black light output with consequent inconsistent performance, a constant-voltage transformer should be used when there is evidence of voltage fluctuation.
Caution: Certain high-intensity black light may emit unacceptable amounts of visible light, which will cause fluorescent indications to disappear. Care should be taken to use only bulbs certified by the supplier to be suitable for such examination purposes.
Note: The recommended minimum light intensity is intended for general usage. For critical examination, higher intensity levels may be required.
Black Light Warm Up - Allow the black light to warm up for a minimum of 10 min prior to its use or measurement of the intensity of the ultraviolet light emitted.
Visual Adaptation - The examiner should be in the darkened area for at least 5 min before examining parts to allow the eyes to adapt to the dark viewing.
Caution - Photochromic lenses shall not be worn during examination.
9.0 INTERPRETATIONS AND EVALUATIONS OF INDICATIONS:
9.1 All indications shall be evaluated in accordance of the referencing Code or Specification.
9.2 Acceptance Criteria are listed for specific codes in Annex-1 of this document. Any conflicts between these documents and applicable Code section shall be resolved by the NDT Level III or Divisional Manager (NDT) .
9.3 Mechanical discontinuities at the surface can result in false or irrelevant indications. Any indications which is believed to be non relevant shall be regarded as a discontinuity and shall be re-examined to verify whether or not actual defects are present.
9.4 Non relevant indications and broad areas of pigmentation which would mask indications of defects are unacceptable and require corrective action by cleaning or other suitable means of surface preparation as described herein and retest.
9.5 Make sure that surface indications are not false indications i.e. machining marks, mechanical conditions or other surface conditions which cause or produce false indications.
9.6 Interpretation of indications found and determined to be rejectable shall be based on the size of the indication. Linear indications are those having a length greater than three times the width. Rounded indications are those that are circular or elliptical shape with the length equal to or less than three time the width.
9.7 All examination shall be reported on the penetrant testing report form.
10. SAFETY:
10.1 The
certified Inspector shall be responsible for compliance with applicable safety
rules in the use of liquid penetrant materials.
10.2 Liquid penetrant should not be heated or exposed to open flames.
10.3 Penetrant materials may be highly volatile, relatively toxic and the liquid may cause skin irritation. Adequate ventilation at all times shall be used.
10.4 Aerosol cans of penetrant materials should be kept out of direct sunlight or areas in excess of 130 °F. Excessive heat may cause aerosol cans to explode.
10.5 Avoid looking directly into black light source, since the eyeball contains a fluid that fluoresces if black light shines directly into the eye.
11. POST CLEANING:
11.1 Post cleaning is required (unless otherwise specified in contract) to remove any excess residues from the penetrant process.
11.2 A suitable cleaning technique such as water wash, vapours degreasing, solvent soak may be employed.
11.3 Caution should be exercised to remove all developer prior to vapour degreasing as vapour degreasing can bake the developer on parts.
11.4 Post cleaning of water washable fluorescent penetrant tests could be done by flushing surface with forced water spray or by flushing the surface with an approved solvent cleaner depending on the actual job requirements. Clean cloth and or absorbent paper towel and or dry air jet could also be used.
11.5 Points mentioned in 11.4 is applicable for water washable - visible dye also.
12. PERSONNEL QUALIFICATION AND CERTIFICATION
12.1 Personnel performing examinations in accordance with this procedure shall be qualified and certified in accordance with SNT-TC-IA (1992 edition) or CP-189 (1995 edition) of ASNT.
12.2 Only individuals qualified to NDT Level I and working under the supervision of an NDT Level II or III or individuals qualified to NDT Level II shall perform the examinations in accordance with this procedure.
13. PREFERENCE FOR WATER WASHABLE PROCESS
Water washable process shall be used for testing the following:
13.1 Articles having a rough surface.
13.2 Articles having threads and keyways.
13.3 High production of many small articles.
13.4 Weld inspection in closed vessels or tanks.
13.5 Weld or other component inspection when solvent process is found not suitable or preferable.
13.6 Articles having medium rough surfaces (if medium sensitivity is acceptable).
13.7 Leak detection system.
13.8 Welds, articles when cost control is a prime point.
14.0 CHARACTERISTICS OF WATER-WASHABLE FLUORESCENT PENETRANT TESTS:
Dye Penetrant Inspection - Advantages
- Fluorescence Ensures Visibility
- Easily Washed with Water
- Good for Volume Testing of
- Small Specimens
- Good on Rough Surfaces
- Good on Keyways and Threads
- Good on Wide Range of Discontinuities
- Fast, Single Step Process
- Relatively Inexpensive
- Available in Lox Compatible Form
Dye Penetrant Inspection - Disadvantages
- Requires Darkened Area For Inspection
- Not Reliable for Detecting Scratches and
- Similar Shallow Surface Discontinuities
- Not reliable on Reruns of Specimens
- Not Reliable on Anodised Surfaces
- Acids and Chromate’s Affect Sensitivity
- Easily Over-washed
- Penetrant Subject to Water Contamination
DYE PENETRANT INSPECTION - ANNEX - I
PENETRANT TESTING ACCEPTANCE CRITERIA
The acceptance criteria given hereunder for relevant indications for various codes shall be used in general throughout of Third Party. The inspector using this is cautioned that Code requirements do change, and that in the case of conflict it shall be referred (in writing) to the appointed NDT Level III or the Divisional Manager (NDT) .
DYE PENETRANT INSPECTION - API 1104
Rejection Criteria
1. Liner Indications
Indications > 1/16” (1.59mm) shall be considered as Relevant Indication, Relevant indications are rejectable if:
a. Evaluated as crater cracks or star cracks and > 5/32” (3.96mm) in length.
b. Evaluated as cracks other than crater cracks or star cracks.
c. Evaluated as IF and >1” (25.4mm) in total length in a continuous 12” (304.8 mm) weld or >8% of the weld length.
2. Rounded Indications.
For evaluation, the maximum dimension of rounded indications shall be considered as it size. Indications are rejectable as defects if:
a. Individual indication > 1/8” (3.17mm)
b. Distribution of scattered rounded indications exceed concentration API 1104 fig. 18 or 19.
c. Clustered rounded indications > 1/2” (12.7mm)
d. Combined length of clustered indications > 1/2” in any 12” (304.8mm) weld.
e. Any individual indication in a cluster > 1/16” (1.59mm).
DYE PENETRANT INSPECTION - ANSI/ASME B31.1
1. Liner indication: Any crack or liner indication.
2. Rounded indications
a. Indications is dimensions > 3/16” (5.0mm).
b. Four or more rounded indication in a line separated by 1/16” (2.0mm) or less edge to edge.
c. Ten or more rounded indication in any 6 sq. in. (3870mm2) of surface with the major dimension of this area not to exceed 6 in. (150mm).
DYE PENETRANT INSPECTION - ANSI/ASME B31.3
1. Liner indications: Any cracks or linear indications.
2. Rounded indications
Pending verification from ANSI. Until otherwise stipulated by ANSI B31 Committee, apply B31.1 criteria for rounded indications.
DYE PENETRANT INSPECTION - ASME Section VIII Div. 1
The following indications shall be rejectable as defects:
1. Relevant linear indication >1/16” (1.59mm)
2. Relevant rounded indications >3/16: (4.77mm)
3. Four or more rounded indications in a line separated by 1/16” (1.59mm) or less (edge to edge).
DYE PENETRANT INSPECTION - AWS D1.1
Acceptance criteria is dependent on service condition. Refer to the relevant project NDT Supervisor or Area NDT Manager.
DYE PENETRANT INSPECTION - ANNEX - II
ULTRAVIOLET LIGHT INTENSITY VERIFICATION
1. The ultraviolet light intensity shall be determined using a UV Products Mode J-221 Long Wave UV Meter or equivalent. The procedure for using the J-221 meter is as follows:
1.1 Secure the black light fixture in a stable position at a distance greater than 6 inches.
1.2 Check to see that the black light bulb is on and has been allowed to warm up for at least 5 minutes.
1.3 Ensure that the J-221 meter face is vertical and the meter has been zeroed. (The zero should be checked with the sensor cell unplugged). Correct the zero when necessary by turning the screw located directly below the meter pointer.
1.4 Record the meter reading without the UPV Filter # 50107 attached to the J-221.
1.5 Attach the UPV Filter # 50107 over the sensing element of the J-221 and record the meter reading.
1.6 Subtract the reading recorded in 1.5 from the reading recorded in 1.4 and document the results.
1.7 Ensure that the value obtained in step 1.6 is a minimum of 3000 microwatt/cm2 for work in areas other than booths specifically designed for ultraviolet light work. For work in a darkened booth, a minimum value of 1000 microwatt/cm2 is required.
1.8 The black light intensity shall be measured at least once every 8 hours, or whenever the work station is changed.
Note: The J-221 meter has 2 scales. The A scale reads from 0-12 and the B scale reads from 10-60. To convert the meter reading to microwatts per square cm., multiply the meter reading by 100. For example, a meter reading of 30 would be 30 x 100 = 3000 microwatts/cm2.
Free newsletter!
Sign up to receive my monthly newsletter covering all the latest courses and updates.
FIND US HERE:


Copyright © 2012-2024 Inspection 4 Industry LLC
Contact Inspection 4 Industry by Email
Contact by Phone - 949-383-0564