Watch our Most Recent Videos | Visit us on LinkedIn | Visit us on YouTube
Pressure Vessel Heads
The Pressure Vessel Heads article provides you with information about different types of ASME heads and related points in pressure vessel inspection.
How many standard Pressure Vessel Heads are in the ASME Code? What are their characteristics?
This article introduces you, different type of Heads, applications and dimensional features.
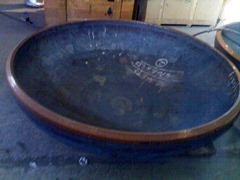
The Ellipsoidal Head, Hemispherical Head and Torispherical Head are three types of ASME Pressure Vessel Dished Heads.
See the following Fig. for these heads sketches:
The requirements for pressure vessel heads are covered in the I4I Academy Online API 510 pressure vessel inspector course and ASME training courses.

Pressure Vessel Heads - Ellipsoidal Head Dimensional Characteristics:
In the same design condition, such as design pressure, design temperature and material, your calculated wall thickness under internal pressure will be approximately equal to shell thickness.
For example if you have calculated your shell thickness under internal pressure and obtained 12 mm, your ellipsoidal head thickness also will be approximately 12 mm.
The inside depth of your ellipsoidal head (h in above fig.) will be one-fourth of the head inside diameter (h = D/4).
Your ellipsoidal head knuckle radius is 0.17D and the spherical radius is 0.9D.
Pressure Vessel Heads - Torispherical Head Dimensional Characteristics
In the same design conditions within the same design pressure, design temperature and material, your calculated wall thickness under internal pressure will be approximately equal to 1.77 times the shell thickness.

For example, if you have calculated your shell thickness under internal pressure and obtained 12 mm, your torispherical head thickness will be approximately 21.24mm.
Your torispherical head knuckle radius is 6% of the inside crown radius, and your crown radius is equal to outside the diameter of the head skirt.
Pressure Vessel Heads - Hemispherical Head Dimensional Characteristics
With the same same design conditions with the same design pressure, design temperature and material, your calculated wall thickness under internal pressure will be approximately half of the shell thickness.
For example, if you have calculated your shell thickness under internal pressure and obtained 12 mm, your hemispherical head thickness also will be approximately 6 mm.
The inside depth of your hemispherical head will be one-half of head inside diameter (h = D/2).
Dimensional Inspection of Pressure Vessel Dished Heads
You need to make a dimensional inspection on the pressure vessel heads for any effort for the fit-up process. The dimensional inspection is done on the knuckle radius, crown radius, skirt length, depth and thickness.
Review the Pressure Vessel Dimensional Inspection Article for a detailed description for heads inspection.
Pressure Vessel Dished Head Joint Efficiencies:
If your dished head is welded and the joint efficiency is 1, then all of your head welds need full length radiography.
If your dished head is seamless and your joint efficiency is 1, your head to shell needs full radiography and spot radiography for your ellipsoidal or torispherical heads.
For a more detailed description, please review the ASME Pressure Vessel Joint Efficiencies article.
Free newsletter!
Sign up to receive my monthly newsletter covering all the latest courses and updates.


